6 minutes
Website setup part 2 - Create a github actions workflow
In the previous part I described how I set up an S3 bucket for static website hosting.
In this part, I will describe what my solution looks like to automatically generate and upload html files by using Hugo and github actions. To get started, you require a github repository.
Create a Github repository
The first step obviously is to create a github repository. Make sure the repository has private visibility. The next step is to clone this repository in order to have a local copy of it which you can work with. Once this is done, you are ready to go.
Install hugo
To create a hugo-based website, we first need a working hugo installation. There are multiple ways to achieve this. I chose to use a docker image for that. See the hugo installation guide for further information on how to install hugo.
This image can be used as a hugo command or you can run the container interactively to experiment a bit with it (that´s what I recommend). To do so, mount your local hugo code into the container and issue the bash hugo server -D command. You cna then see your results at http://localhost:1313.
# run the klakegg container and mount the local filesystem to it
docker run --rm -it -v <localpath>:/src -p 1313:1313 klakegg/hugo:0.73.0-ext-ubuntu shell
# now use hugo to serve the content under localhost
hugo server -D
Verify your hugo installation by issuing the hugo --version command.
Now with a working hugo installation, follow along the hugo quickstart tutorial in order to create a new hugo-based website. I chose the hello-friend ng theme, but this is totally up to you.
You now have a hugo-based website and a corresponding github repository. The next step is to create the github actions workflow. This workflow will generate static website content and automatically upload it to the S3 bucket.
Create an IAM user to upload content
Before you can upload files to the S3 bucket, you need to have access to the AWS API. Therefore, you need to create an IAM user and attach roles to it. Following the principle of least privilege, the roles attached to the user should only provide the minimal required permissions to accomplish this task. You´ll require two roles: The first role grants permission to upload files to the S3 bucket. The second role grants access to create invalidation requests for the CloudFront distribution we created earlier. This is required to minimize the time changes take to become visible.
Let´s create the first role:
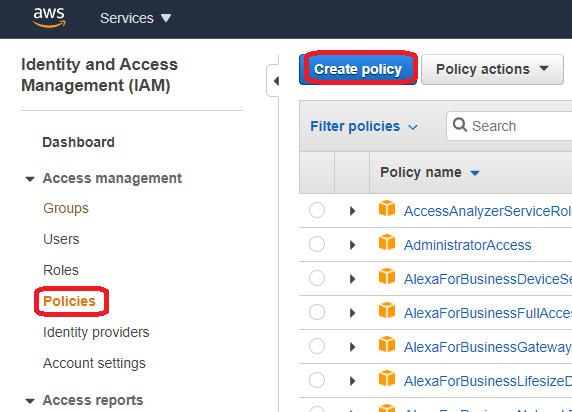
Login to your AWS console and choose the IAM service. Once there, click on Policies on the left hand side. In the opening panel, click on Create policy.
In the opening window, choose the JSON tab and paste the following content into the field. Make sure you replace both placeholders with your actual bucket name.
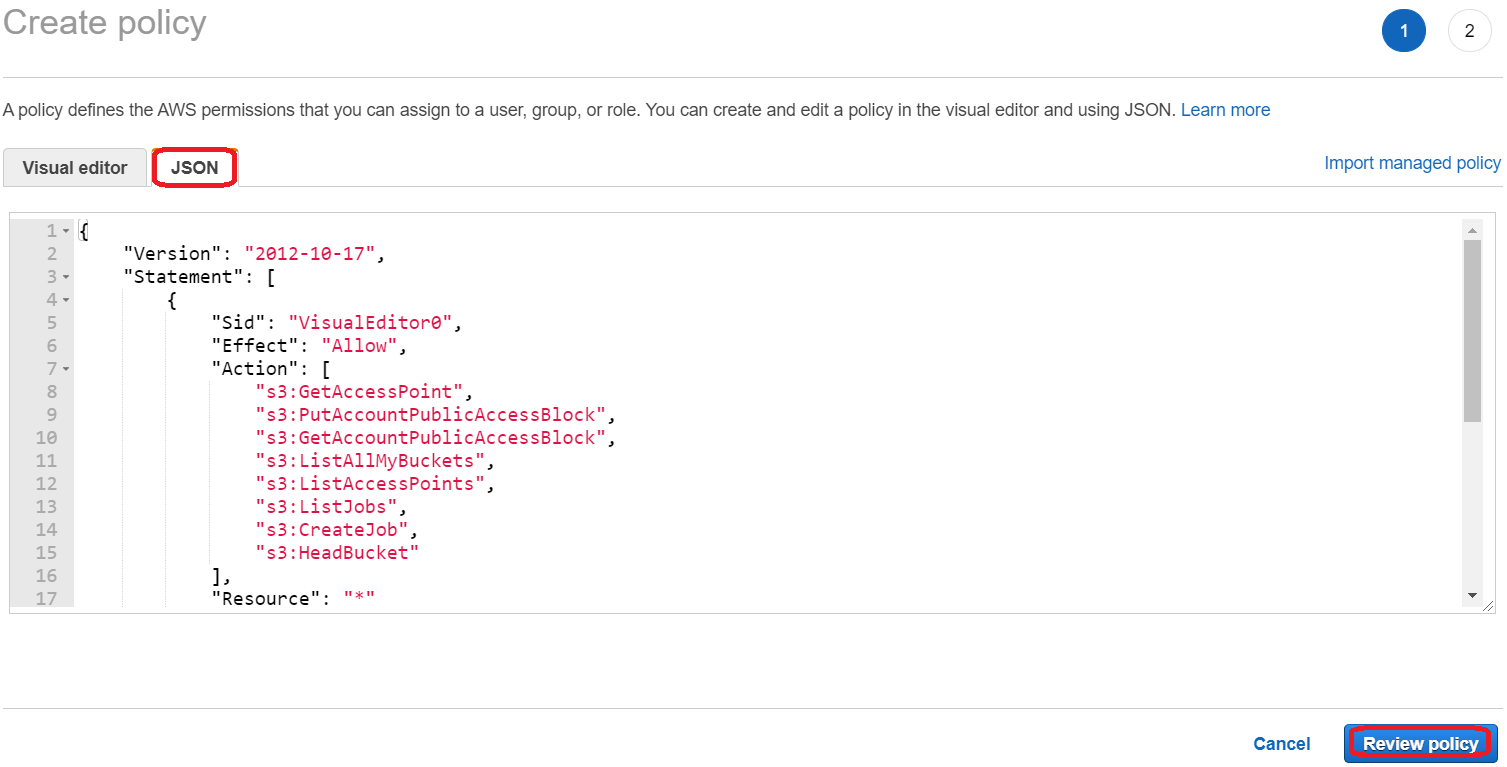
{
    "Version": "2012-10-17",
    "Statement": [
        {
            "Sid": "VisualEditor0",
            "Effect": "Allow",
            "Action": [
                "s3:GetAccessPoint",
                "s3:PutAccountPublicAccessBlock",
                "s3:GetAccountPublicAccessBlock",
                "s3:ListAllMyBuckets",
                "s3:ListAccessPoints",
                "s3:ListJobs",
                "s3:CreateJob",
                "s3:HeadBucket"
            ],
            "Resource": "*"
        },
        {
            "Sid": "VisualEditor1",
            "Effect": "Allow",
            "Action": "s3:ListBucket",
            "Resource": "arn:aws:s3:::<bucketname>"
        },
        {
            "Sid": "VisualEditor2",
            "Effect": "Allow",
            "Action": "s3:*",
            "Resource": "arn:aws:s3:::<bucketname>/*"
        }
    ]
}
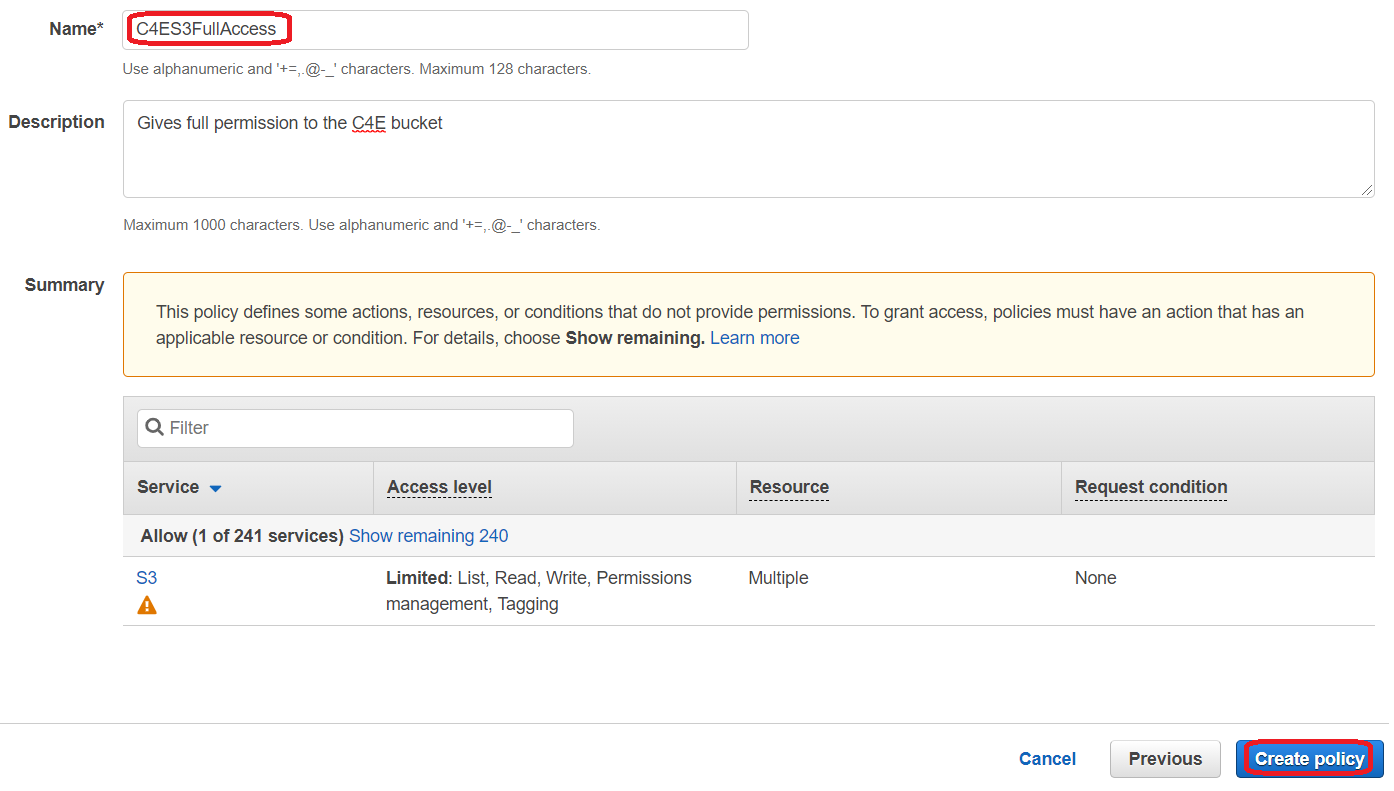
Now, click on Review policy. On the next page, give your role a name (e.g. MyStaticWebsiteBucketUploadPolicy) and a description and click Create policy.
Repeat these steps to create a second role. As JSON, use the code below. Make sure you replace the placeholders with your account- and distribution-id.
{
    "Version": "2012-10-17",
    "Statement": [
        {
            "Sid": "VisualEditor0",
            "Effect": "Allow",
            "Action": [
                "cloudfront:ListInvalidations",
                "cloudfront:GetInvalidation",
                "cloudfront:CreateInvalidation"
            ],
            "Resource": "arn:aws:cloudfront::<your-account-id>:distribution/<your-distribution-id>"
        }
    ]
}
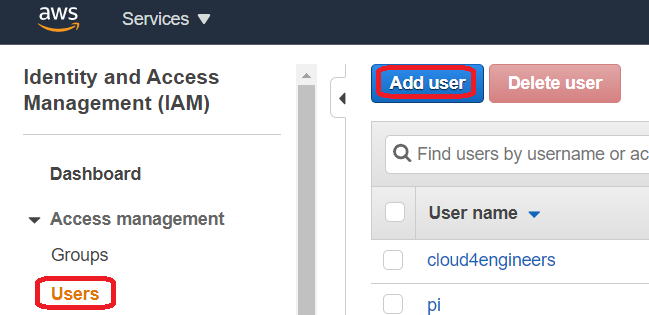
Now that you have both roles in place, it´s time to create the user. On the left side, choose Users and then click Add user.
 In the opening panel, choose Attach existing policies directly and search for your new roles using the search field. Check both roles and click Next: Tags.
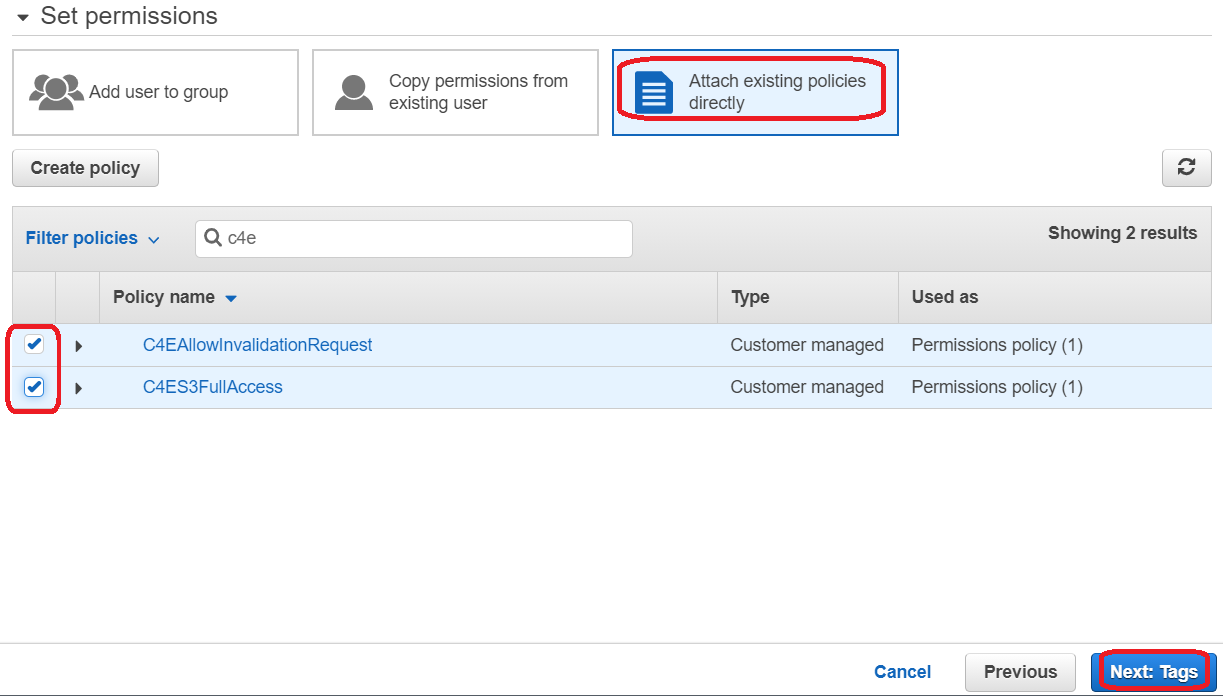 If you want, you can add tags to your user. Click Next. You´ll be displayed the user credentials - save them, you will nee them later.
Create github actions workflow
GitHub Actions makes it easy to automate all your software workflows, now with world-class CI/CD. Build, test, and deploy your code right from GitHub. Make code reviews, branch management, and issue triaging work the way you want.
The quote above comes from github and already summarizes that github actions is a powerful mechanism to automatically do things to commited code. We want to use this power to automate website generation. As a convention, github recognizes .yaml files located under .github/workflows as github action workflows and executes them on every commit (if not configured in a different way). So the only thing to do here is to add a file to the repository: .github/workflows/generate-static-website.yml. The file should have the following content:
name: Docker Image CI

on:
  push:
    branches: [ master ]
  pull_request:
#    branches: [ master ]

jobs:

  build:

    runs-on: ubuntu-latest

    steps:
    - uses: actions/checkout@v2
      with:
        submodules: 'recursive'
    - name: Run the image
      run: |
        docker run --rm -v $GITHUB_WORKSPACE/content:/src -e AWS_ACCESS_KEY_ID=$AWS_ACCESS_KEY_ID -e AWS_SECRET_ACCESS_KEY=$AWS_SECRET_ACCESS_KEY -e S3_BUCKET=<bucketname> -e DISTRIBUTION_ID=<distribution-id> ellistheellice/hugo-to-s3:latest
      env:
        S3_BUCKET: ${{ secrets.S3_BUCKET }}
        DISTRIBUTION_ID: ${{ secrets.DISTRIBUTION_ID }}
        AWS_ACCESS_KEY_ID: ${{ secrets.AWS_ACCESS_KEY_ID }}
        AWS_SECRET_ACCESS_KEY: ${{ secrets.AWS_SECRET_ACCESS_KEY }}
Explanation: The “on” area defines when such a workflow should be executed. In this case the workflow is executed every time there is a commit on the master branch.
Below is the ‘steps’ area. This is where the logic takes place. The first step ensures that submodules are updated automatically. As a reminder: Hugo uses submodules to integrate the themes.
In the second step, a Docker container is started. Environment variables are given to the container, which are fed from so-called git secrets. In addition, the current directory is mounted in the container here. The container comes from me and is freely available on Dockerhub. If you´re curious, have a look at the corresponding github repository. The container executes Hugo and uploads the resulting files to the S3 target bucket. A so-called invalidation request is then automatically sent to CloudFront, which deletes the updated files from the cache so that the changes are immediately visible. The environment variables:
- S3_BUCKET: Destination bucket to which the generated files are to be uploaded
- DISTRIBUTION_ID: The CloudFront Distribution id. It is required for the invalidation request.
- AWS_ACCESS_KEY_ID: The access key to interact with the AWS API. Use the Access key from the previously created user
- AWS_SECRET_ACCESS_KEY: The secret key to interact with the AWS API
Before you commit this file, you have to define the above mentioned secrets. In your github repository, go to Settings -> Secrets and create a secret for every environment variable mentioned above. The result should look like this:
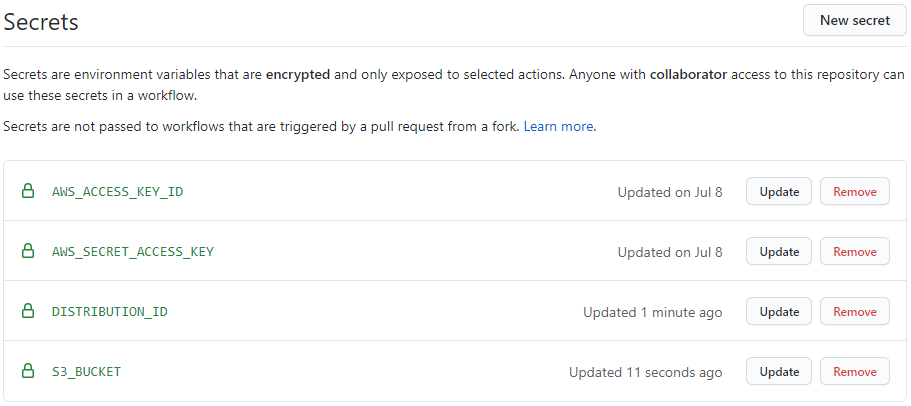
Now you are ready to commit your changes. This should trigger the workflow. In github, go to Actions -> Docker Image CI -> build and have a look at the logs.

Verify that your files are in the S3 target bucket now. If not, have another look at the logs and check what happened. Feel free to open a pull request to the docker image when you observe any misbehaviors.
– Great! You now have S3 configured for static website hosting and a way to automatically push changes to your website. Let´s move on and see how we can enable dynamic website content.
Comments